Snowflake Lip Balm Card
Coastal Cabana Cardstock cut at 3 ½ x 5 ¾”, scored at 2 ½
& 3 ¼”
Highland Heather Cardstock cut at 3 ¼ x 2 1/8”
Basic White Cardstock cut at 3 ¼ x 2 1/8”
Stamp set: Snowflake Wishes
Dies: So Many Snowflakes Dies
Ink: Coastal Cabana
Adhesives: Liquid glue, I use tombow; Glue Dots
Embossing Folder: Wintry 3D
Jewel
Ribbon: Pool Party sheer
Make pencil
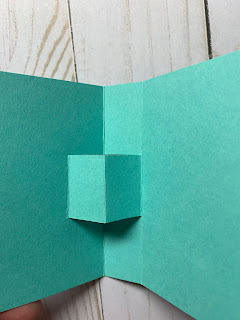
marks at 1 ¼ & 2 ¼” as shown above; Fold card on score lines
Fold card at
back fold line, turn over and cut from back score line to front score line at
the pencil marks.
Crease inner
lip balm holder well. (Inside)
Emboss the
Highland Heather piece by using the Wintry 3D Embossing Folder and the Cut
& Emboss Machine
Glue the
Highland Heather piece onto the card front, making sure not to get glue where
the lip balm will go.
Use the Cut
& Emboss Machine to cut one glittery white snowflake and one Coastal Cabana
snowflake.
Glue the
White snowflake onto the card front using Liquid glue. Add a Glue Dot to the center of the white
snowflake and add the Coastal Cabana snowflake to it. Add a jewel.
Stamp the
white piece in Coastal Cabana Ink using the sentiment from the Snowflake Wishes
Stamp set. Glue white piece inside card.
Using a
regular hole punch, punch holes in the front and back of the card as shown.
Add a glue
dot to the lip balm and put into the lip balm slot, make sure the glue dot
sticks it to the card.
Using the
Pool Party Sheer Ribbon, tie the card shut.
Use a glue dot to make your bow behave if needed. Angle the tie ends.


No comments:
Post a Comment